
Skill Level
Beginner
Time to Make
30 mins
How to Make
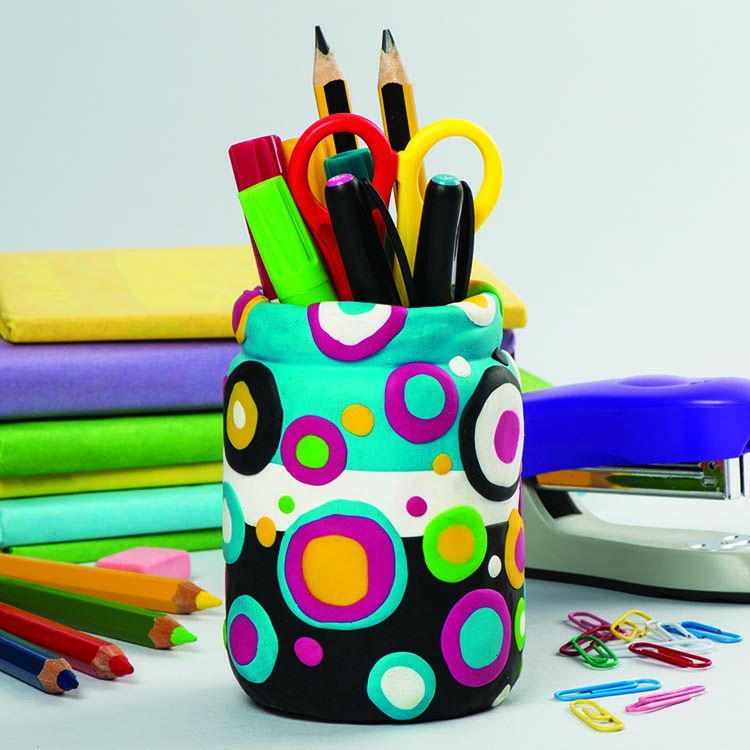
- Work on a smooth surface, like a clean baking tray, a large tile or a plastic board.To cover the top part of the jar with a background colour, you need a Fimo rectangle measuring 21cm x 8cm. Roll out 1 x Fimo block to 2mm thick, measure and cut the rectangle using a craft knife, then carefully lift the rolled clay and wrap it around the top of the jar, leaving a couple of centimetres at the top so this can be folded over the rim. Smooth down the join where the ends meet, and smooth around the neck of the jar with your fingers.
- Roll out ½ a Fimo block in another colour to make the middle stripe. Make it 2mm depth, so its the same level as the first piece. Trim the rolled Fimo to 24cm x 2cm then wrap it around the middle of the jar, pressing it against the top strip and smoothing the join with your fingers. Keep your fingers clean with wet wipes.
- Roll out ¾ of a Fimo block in another colour to make the bottom section. Make it 2mm depth, so its the same level as the other 2 pieces. Trim the rolled Fimo to 24cm x 6cm then wrap it around the bottom of the jar, pressing it against the middle strip and smoothing the join with your fingers.
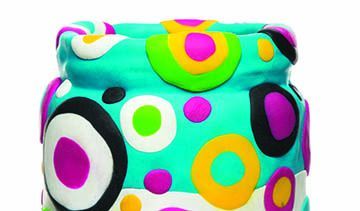
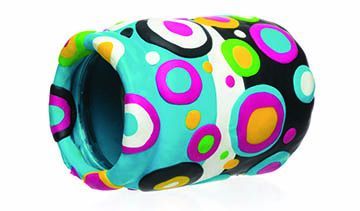
- Shape some Fimo balls 5mm, 1cm, 2cm different colours. Flatten the balls into circles with your fingers or use a roller. Press the smaller circles into the middles of the larger circles, using 2 or 3 colours each time in different colour combinations. Flatten each layered circles again so the surface is smooth then press onto the jar. When the jar is covered all the way round carefully press a few circles over the rim of the jar. Add some smaller 3mm-5mm circles to fill in the gaps.
- Place the jar on a baking tray. Bake in a preheated oven for 30 minutes at 110oC following the instructions on the packet. Allow Fimo to cool before handling.
Step 1
Step 2

Step 3


Share
×You can copy this link into emails, text messages or post on social media.
Share now