
Skill Level
Beginner
Time to Make
30 mins
How to Make
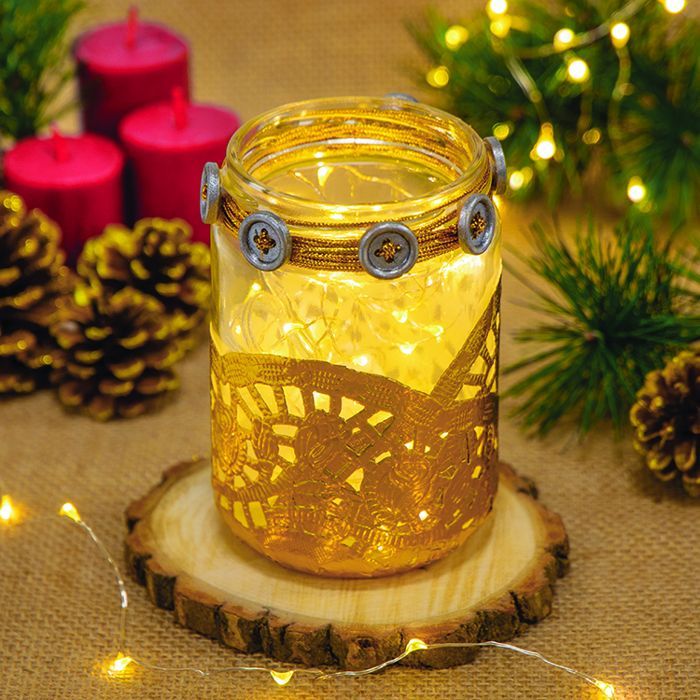
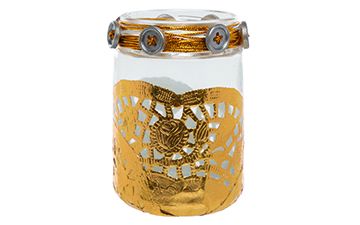
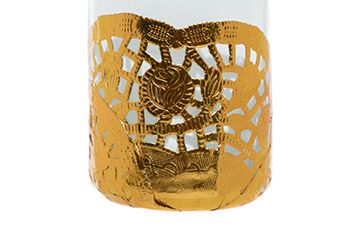
- Use a brush to apply a thin coat of PVA glue to the bottom half of the jar. Starting with 1 gold doily, lightly stick the patterned edge to the jar and adjust the placement of the doily if needed. Press the doily down and smooth out any wrinkles, but don’t wrap the doily around the bottom of the jar. Repeat this with another doily on the opposite side of the jar.
- Brush another thin layer of glue over the paper doilies. Turn the jar upside down and leave to dry.
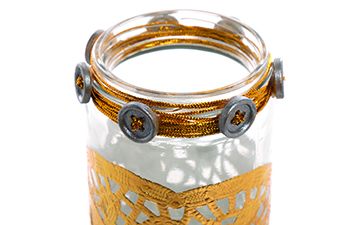
- Whilst the jar is drying paint 7 wooden buttons with silver acrylic paint and leave these to dry.
- Cut off the overlapping paper doily just below the bottom of the jar. On the leftover edge of the doily make vertical cuts so that the edge becomes a fringe. Apply a thin layer of glue on the white side of the doily and press the edges to the bottom of the jar. Cutting the doily into a fringe will help it to bend to the curve of the jar. Place the jar back upside down and leave to dry.
- Thread a large needle with the gold hanging cord. Then thread the cord through the dry silver buttons to create a cross pattern. Tie off the thread at the back of the buttons or use a glue dot to secure it in place.
- Once the jar is dry use a glue dot to stick one end of the gold cord just under the rim of the jar. Wrap the cord around the jar until the rim is thoroughly covered. Stick the other end of the cord back on the glue dot and trim the excess string. If the glue dot has been covered by the cord, use an additional glue dot to stick down the end.
- Place a glue dot on the back of each button and stick them around the rim of the jar. Make sure the buttons are spaced evenly.
Step 1
Step 2
Step 3


Share
×You can copy this link into emails, text messages or post on social media.
Share now