
Skill Level
Beginner
Time to Make
30 mins
How to Make
-
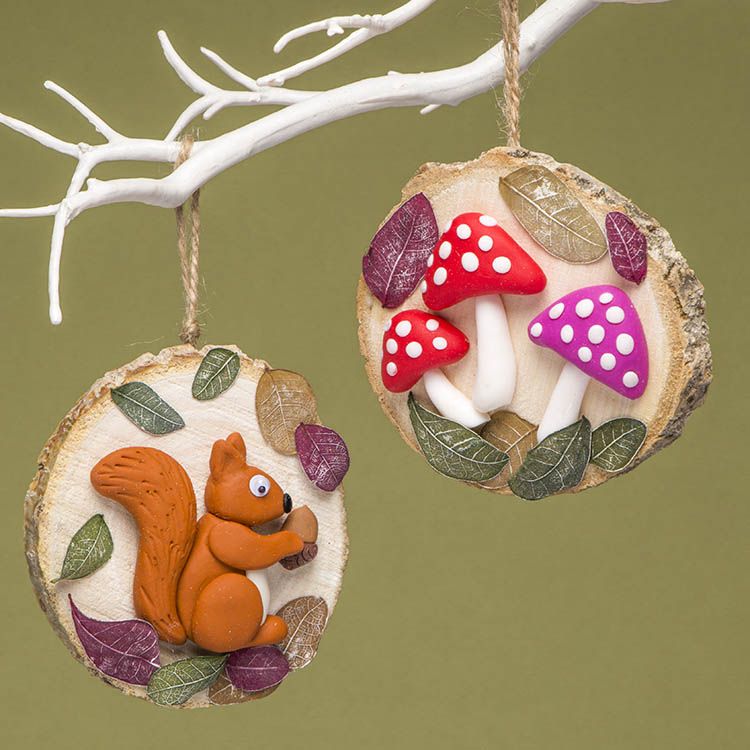
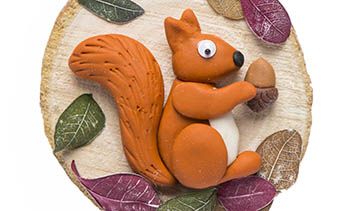
Fimo Red Squirrel
- Knead together 2 x strips of brown Fimo and 2 x strips of orange Fimo until they are evenly blended. Use this as the main colour for your squirrel, or alternatively use grey or another colour.
- Shape a 1cm Fimo ball into the head, making one end more pointed.
- Shape a 2cm Fimo ball into a pear shape for the body. Press a thin, flat white Fimo strip onto the front of the body.
- Press the head onto the body with a small, curved strip for the arm.
- Press a small ball below of the body for the foot with a flattened circle for the leg.
- Press 2 small triangles onto the head for ears then blend in with a modelling tool. Add a black nose.
- Shape a 2cm Fimo ball into a curved tail shape, making it thinner at one end. Press the thinner end onto the squirrel’s body.
- Model a Fimo acorn or nut for the squirrel to hold.
-
Fimo Mushroom
- Shape 1 Fimo strip for the top of the mushroom. Press it into a triangle shape with a curve along the bottom edge.
- Shape half a Fimo strip into the stalk. Press it under the top of the mushroom.
- Roll some tiny Fimo balls then press onto he top of the mushroom for spots.
- To make a smaller sized mushroom use less Fimo clay.
- Bake Fimo models at 110C in a pre-heated oven, following instructions on the packet. Allow to cool before handling.
-
To build a scene:
- Smooth the surface of the willow circle with medium grade sandpaper. The easiest way is to tape the sandpaper onto a work surface then rub the circle firmly over the top.
- Glue the hardened and cooled squirrel or mushroom models to the middle of the wooden circle with some natural leaves around the edge. Glue a wiggly eye onto the squirrel. Leave to dry.
- Lightly brush the leaves with white paint to highlight the texture.
- Glue a loop of jute twine onto the back of the wooden circle. Leave to dry thoroughly before hanging up.
Step 1
Step 2

Step 3


Share
×You can copy this link into emails, text messages or post on social media.
Share now