
Skill Level
Beginner
Time to Make
1+ day
How to Make
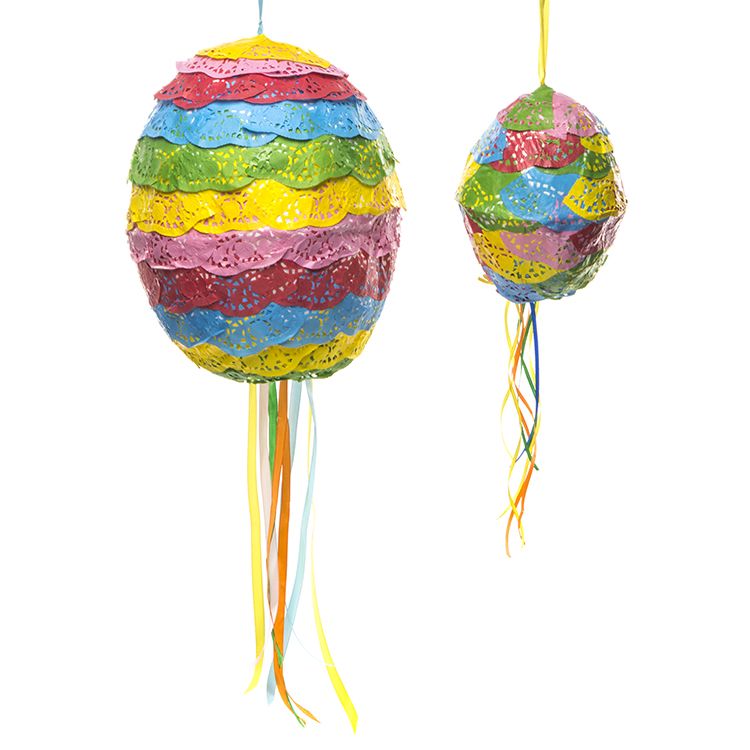
- The piñatas shown were made in bowls measuring 15cm diameter (small size) and 24cm diameter (large size).
- This egg-shaped piñata is made in two halves. To make one half, tear up some sheets of newspaper into strips. Brush a layer of PVA glue inside a mixing bowl then start sticking down the newspaper to build up 3-4 layers. Smooth down each layer of newspaper, brushing with more glue until the bowl is completely covered. Continue the layers just above the top of the bowl. Leave to dry for several hours or ideally overnight then add 3-4 more layers of PVA and newspaper. Leave to dry.
- When the edge of the newspaper has dried at the top, carefully start to pull it away from the sides of the mixing bowl. If the papier mache sticks to the side of the bowl, leave it for a few extra hours to dry out. When the papier mache shape has been lifted out of the bowl, leave it to dry thoroughly as it may not be completely dry at this stage. To fully dry the outside, turn the mixing bowl upside down with the papier mache shape on top to support it.
- Repeat to make another half egg shape in the same way, using the same sized mixing bowl.
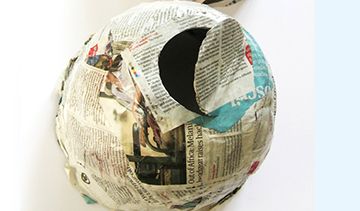
- When both halves are fully dry, trim around the tops to neaten the shapes. Cut a flap in the base of one of the papier mache shapes. This half will form the lower section of the piñata.
- Place the 2 halves together then stick together with masking tape. Paste a layer of newspaper strips over the tape so the 2 halves are securely joined. Leave to dry.
- Cover the piñata with white paint, or you could use a colour, this will hide any areas of newspaper that may show through the holes in the doilies. Leave to dry.
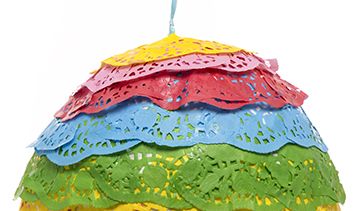
- Cut some coloured paper doilies into quarters. The number needed to cover the piñata will vary depending on the size. Place the piñata in the mixing bowl to hold it still, positioning it with the base facing upwards. Brush a small amount of glue onto each piece of doily, then start sticking them around the sides so they overlap. You could arrange the doilies in stripes of matching colours, or mix different colours. When half the piñata has been covered, turn it over in the bowl.
- Before covering the second half, tie a piece of ribbon into a loop and glue it at the top of the piñata. Stick doilies to cover the rest of the piñata, including some pieces to cover the ends of the ribbon. You may need to cut the doilies into slightly smaller pieces so they fit together at the top. Leave to dry.
- Open the flap at the base of the piñata then make several small holes through the papier mache using pointed scissors or a pointed tool. Push 40cm lengths of ribbon through the holes. Tie a double knot in one of the ribbons inside the flap with a blob of glue to hold it securely in place.
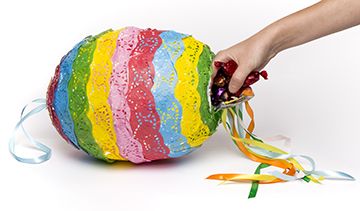
- Fill the piñata with sweets or small Easter eggs then shut the flap. Hang up the piñata. Take turns to pull the ribbons; the knotted ribbons is the only piece that will release the flap.
Step 1
Step 2
Step 3


Share
×You can copy this link into emails, text messages or post on social media.
Share now