
Skill Level
Beginner
Time to Make
1 hour
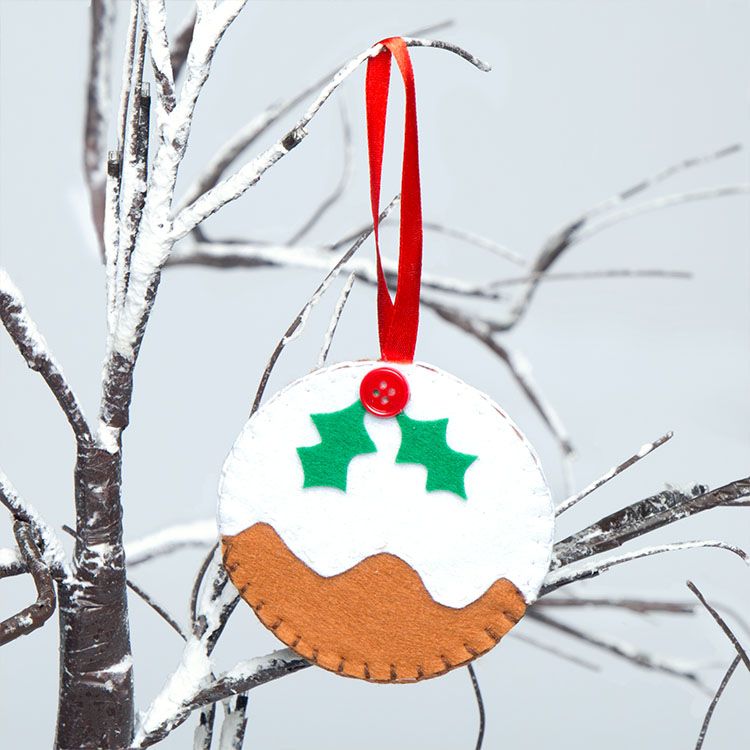
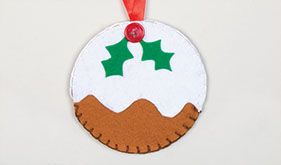
How to Make
- Use a mug or coaster to draw two circles on to a sheet of brown felt using the pencil. Cut out neatly.
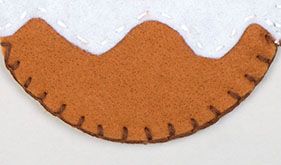
- With the pencil draw around the mug or coaster onto the white sheet to create the upper curve of the circle. Draw in the curved lower shape of the icing before cutting out neatly.
- Pin the white felt on top of one of the brown circles and with white embroidery thread work a line of running stitch along the lower shaped edge to secure into place on the brown circle.
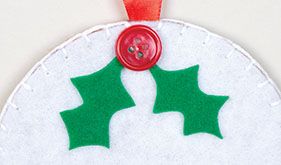
- Create a loop from a 20cm length of ribbon and pin to the back of the embellished brown circle. Pin the remaining brown circle onto the back of the motif and with white embroidery thread work around the upper edge of the circle in blanket stitch to join the two pieces together, ensuring that you work a couple of stitches through the ribbon loop.
- With brown embroidery thread, work around the lower portion of the pudding motif with blanket stitch to join the two pieces together. Knot the threads neatly.
- Trim the green adhesive felt to create two holly leaves and remove the backing and secure to the top of the motif. Remove the backing form the adhesive button and secure to create the berry detail to finish.
Step 1
Step 2
Step 3


Share
×You can copy this link into emails, text messages or post on social media.
Share now