
Skill Level
Beginner
Time to Make
1 hour
How to Make
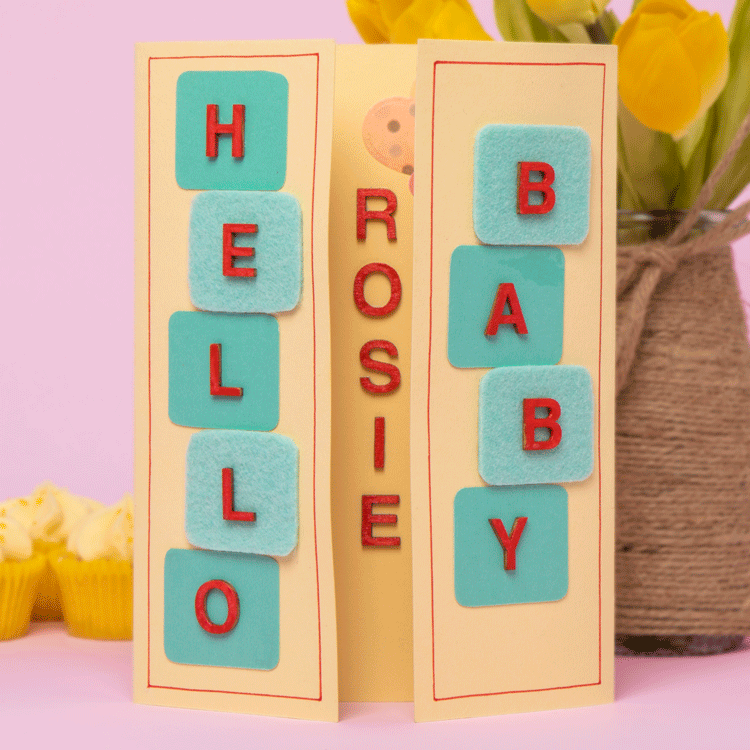
- Cut a piece of pale yellow board card 18cms x 25cms using a craft knife.
- On the wrong side of the card lightly draw the centre line (12.5cms in from edge) with a pencil. Draw 2 more lines 6.25cms from each edge. Score the 2 lines then fold into and line up with the centreline. Rub out the pencil on the scored and central lines.
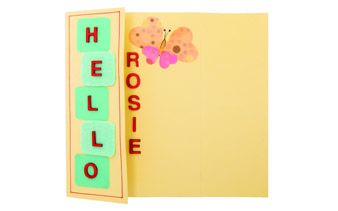
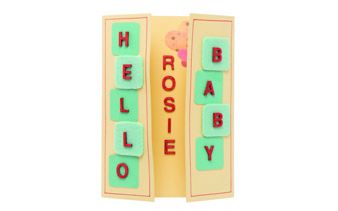
- On each folded panel, in pencil draw a 0.5cm border all around. Using a red felt pen go over the pencil lines.
- Using the green card cut a strip 3.5cm x 15cms and divide into 5, 3cm squares. With the pastel green felt cut a strip 3.5cm x 12cms and divide into 4, 3cm squares. These are the blocks. Corner punch each corner.
- Layout the blocks on the card panels – 5 on the left and 4 on the right, evenly. Stick down with glue stick for the card and super tacky glue for the glue.
- Mix the red metallic paint with a little of the silver in a paint tray. Paint the wooden letters for the blocks and name and allow to dry. Apply a second coat if needed.
- Stick the letters onto the blocks using the super tacky glue.
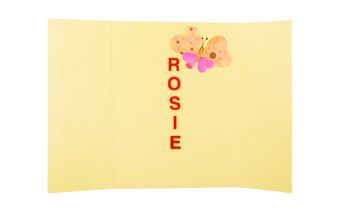
- Using patterned paper cut out 2 big hearts and 2 small hearts. These will make the butterfly wings. On the top right of the centre panel draw a small oblong for the body of the butterfly and then 2 antennae on top.
- Stick down the big hearts first aligning with the body then, the small ones below overlapping the big hearts a little.
- Open up the card and position the letters of the name centrally going down the card. Glue down and allow to dry.
Step 1
Step 2
Step 3


Share
×You can copy this link into emails, text messages or post on social media.
Share now