
Skill Level
Beginner
Time to Make
1 hour
How to Make
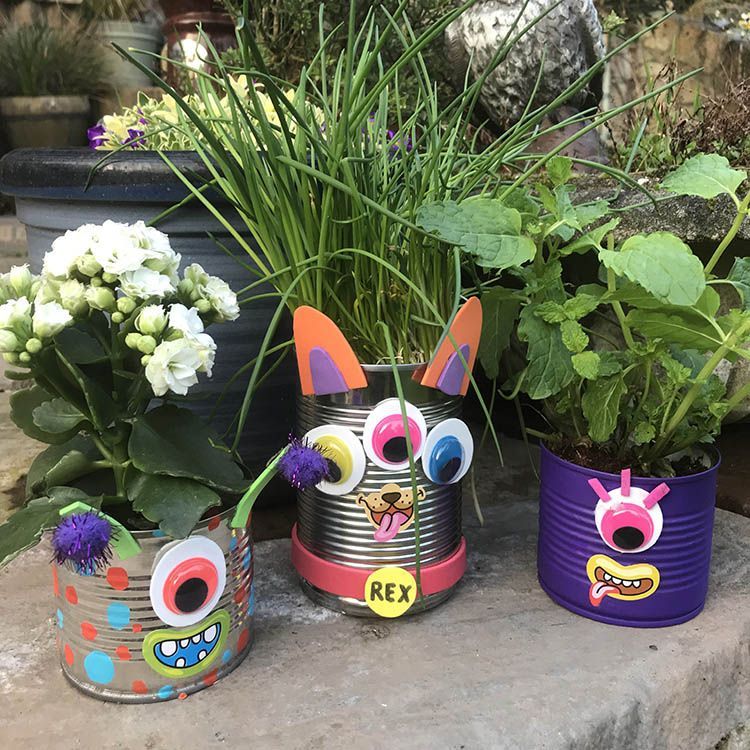
- Remove the label from an old tin. Wash clean with washing up liquid and warm water and wipe dry with a kitchen towel or tissue.
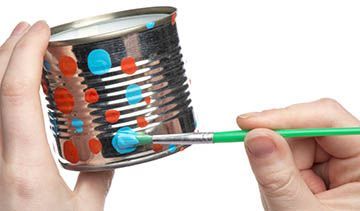
- Choose any colour(s) of your choice of deco acrylic paint and decorate the tin to create the body of the monster. You can paint the whole tin a solid colour or you can decorate with spots or patterns. Leave to dry.
- Stick a coloured wiggle eye onto a sheet of white foam. Draw a circle around the wiggle eye slightly bigger than the size of the wiggle eye. Cut the circle out to make a big monster eye. If you want your monster can planter to have more than one eye repeat this step until you have the desired amount of eyes.
- Attach the eye(s) to the tin using a glue gun or craft glue dots.
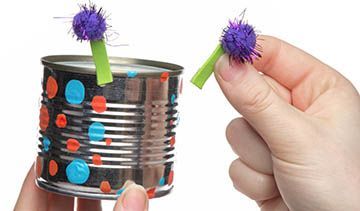
- Cut out two small rectangles from coloured foam to create antennae. Stick two glitter pom poms on top of the rectangles using glue dots.
- Attach the antennae to the top of the can using glue dots. You could also make some ears or spiky hair out of coloured foam too.
- Have a look through the selection of mouth stickers provided. Choose a funny mouth that will stand out well on your monster can and stick onto the tin.
- Place a small plant into the tin.
Step 1
Step 2
Step 3


Share
×You can copy this link into emails, text messages or post on social media.
Share now