
Skill Level
Beginner
Time to Make
30 mins
How to Make
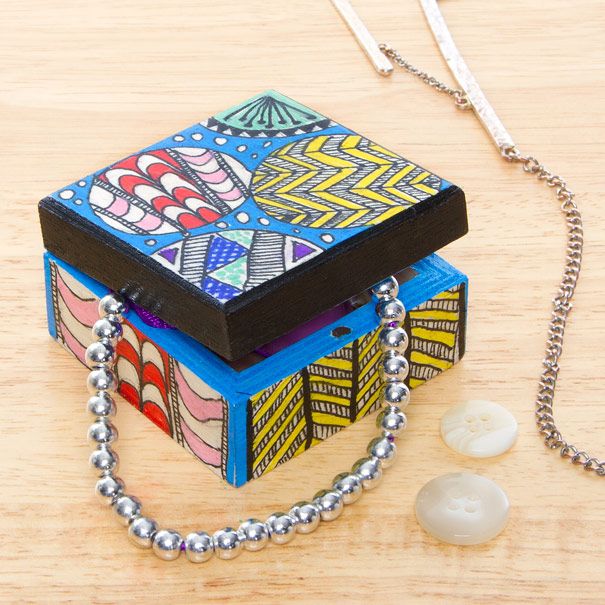
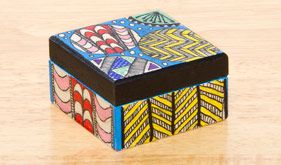
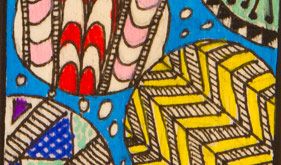
- With a pencil begin to sketch out the design. The top of this box features a series of four large circles filled with different Zentangle motifs including herringbone, triangles, dots, lines and waves.
- Once happy with the sketched design, begin using the tip of the black marker pen to mark out the design across the top of the box.
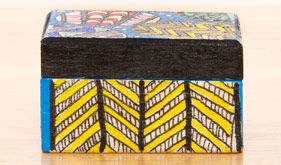
- Select your favourite motifs from the circles featured on the upper section of the box and begin to replicate them along the sides of the box in pencil. Here the herringbone and waves motifs were alternated on the sides around the box.
- Once happy with the sketched design, begin using the tip of the black marker pen to mark out the design around each side of the box.
- Use the eraser to remove any visible sketching lines.
- With a selection of coloured markers begin adding coloured accents to the surface of the box, replicating the colours used on the motifs on the lid onto those worked around the sides of the box.
- Working on each side in turn, use a paintbrush to apply a thin coat of acrylic satin varnish to the box. Allow to dry fully and add a second coat if required.
Step 1
Step 2
Step 3


Share
×You can copy this link into emails, text messages or post on social media.
Share now